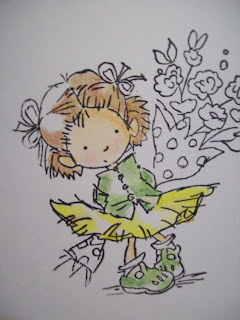
I have three crayons: dandelion, goldenrod and sepia.
I will begin coloring in the skirt with my lightest shade of yellow. But not everything; remember that the light is also hitting the skirt so I will leave parts of it white . I am goingto concentrate on the folds of the skirt and lay down more color there.
 And now add the darker yellow and a bit of sepia into the shadow areas and blend. I could go in and make the shadows darker. There would be no harm in that but this time I am going to leave it as is .See result below:
Now for the fun part! The hair. Hair is always fun because everyone's hair is different and is made up a blend of several colors. I am only going to use two though: chestnut and raw sienna.
I am starting with the lighter and paying careful attention to where the sun would be coming from. As it's coming from over her right shoulder it would not only cast a ray across her clothes but also shine across the top of her head. The darkest area would be on her left side and behind her ears. See example below:
Now I go in with the darker color and just add some depth. See below:

I am not done yet. I will blend with my tortillion and GG.
 So the colors are blended but i'm still not quite happy. See, GG is made to clean up crayons an dchewing gum so in it's very makeup it is designed to "remove" and this also applies to its blending capapbilities. It blends but also lightens a bit. I want more depth.
So in part 3 I will complete her hair by going back in and adding more color down in the shadows and also finish the picture by coloring in her posy and background.


.jpg)


0 comments:
Post a Comment